 Adding CSS & JS and Overriding the Page-Load Template
Dash apps are rendered in the web browser with CSS and JavaScript.
On page load, Dash serves a small HTML template that includes references to
the CSS and JavaScript that are required to render the app.
This chapter covers everything that you need to know about configuring
this HTML file and about including external CSS and JavaScript in Dash
apps.
Adding Your Own CSS and JavaScript to Dash Apps
Dash supports adding custom CSS or JavaScript in your apps.
Create a folder named assets in the root of your app directory
and include your CSS and JavaScript
files in that folder. Dash automatically serves all the files that
are included in this folder. By default, the URL to request the assets
is /assets, but you can customize this with the assets_url_path argument
to dash.Dash.
Note: The
assetsfolder works slightly differently for apps deployed to Dash Enterprise. Learn more at Adding Static Assets.
Important: If you’re using Dash version 2.13 or earlier, you need to include __name__ in your Dash constructor when running these examples.
That is, app = dash.Dash(__name__) instead of app = dash.Dash(). Here’s why.
If you are using Dash 2.14 or later, __name__ is no longer required.
Example: Including Local CSS and JavaScript
We’ll create several files: app.py, a folder named assets, and
three files in that folder:
- app.py
- assets/
    |-- typography.css
    |-- header.css
    |-- custom-script.js
app.py
from dash import Dash, html
app = Dash()
app.layout = html.Div([
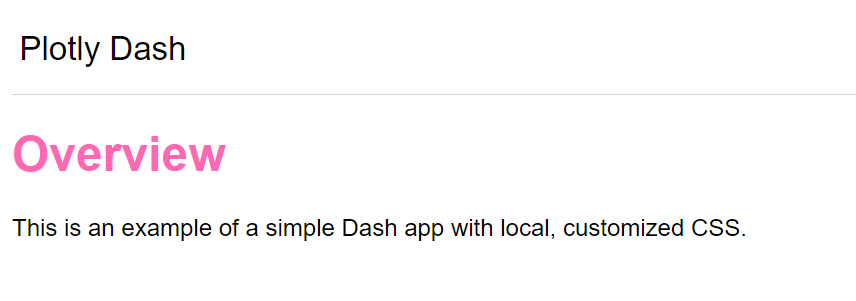
html.Div(
className="app-header",
children=[
html.Div('Plotly Dash', className="app-header--title")
]
),
html.Div(
children=html.Div([
html.H1('Overview'),
html.Div('''
This is an example of a simple Dash app with
local, customized CSS.
''')
])
)
])
if __name__ == '__main__':
app.run(debug=True)
typography.css
body {
    font-family: sans-serif;
}
h1, h2, h3, h4, h5, h6 {
    color: hotpink
}
header.css
.app-header {
    height: 60px;
    line-height: 60px;
    border-bottom: thin lightgrey solid;
}

.app-header .app-header--title {
    font-size: 22px;
    padding-left: 5px;
}
custom-script.js
alert('If you see this alert, then your custom JavaScript script has run!')
When you run your app, it should look something like this:
How Dash Loads Assets
Dash automatically loads assets from the assets directory.
- The following file types will automatically be included:
- CSS files suffixed with
.css. - JavaScript files suffixed with
.js. - A single file named
favicon.ico(the page tab’s icon). -
JavaScript module files suffixed with
.mjs(in Dash 2.16 and later). -
Dash will include the files in alphanumerical order by filename,
so we recommend prefixing your filenames with numbers if you need to ensure
their order (for example,10_typography.css,20_header.css). -
Your custom CSS will be included after the Dash component CSS.
Excluding Assets from Automatic Loading
- You can restrict which files in the
assetsfolder that Dash automatically loads.
Prevent specific files in your assets folder from being automatically loaded by Dash by using assets_ignore when creating your Dash app instance. assets_ignore takes a regex string.
```python
app = dash.Dash(assets_ignore='.*ignored.*')
```
New in Dash 3.1
Prevent specific paths in your assets folder from being automatically loaded by Dash by using assets_path_ignore when creating your Dash app instance. assets_path_ignore takes a list of regex strings.
```python
assets_path_ignore=['folder_with_js']
```
Files ignored for initial load will still be served if specifically requested.
You cannot use
assets_ignoreandassets_path_ignoreto prevent access to sensitive files.
Loading JavaScript Module Files
New in Dash 2.16
To load a JavaScript file as a module in your Dash app, include it in the assets folder with the suffix .mjs.
When the <script> is loaded in the browser, it will be loaded with type="module".
Hot Reloading
By default, Dash includes “hot-reloading”. This means that Dash will automatically refresh your browser when you make a change in your Python code and your CSS code.
Give it a try: Change the color in typography.css from hotpink to orange and see your app update.
Don’t like hot-reloading? You can turn this off with
app.run(dev_tools_hot_reload=False).
Learn more in Dash Dev Tools documentation. Questions? See the community forum hot reloading discussion.
Load Assets from a Folder Hosted on a CDN
If you duplicate the file structure of your local assets folder to a folder hosted
externally to your Dash app, you can use assets_external_path='http://your-external-assets-folder-url'
in the Dash constructor to load the files from there instead of locally. Dash will index your local
assets folder to find all of your assets, map their relative path onto assets_external_path
and then request the resources from there.
app.scripts.config.serve_locally = False must also be set in order for this to work.
NOTE: In Dash 0.43.0 and before, app.scripts.config.serve_locally = False
was the default, except when dev bundles are served (such as during debugging).
Starting with Dash 1.0.0, serve_locally defaults to True.
Example:
from dash import Dash, html

app = Dash(
    __name__,
    assets_external_path='http://your-external-assets-folder-url/'
)
app.scripts.config.serve_locally = False
Embedding Images in Your Dash Apps
In addition to CSS and JavaScript files, you can include images in
the assets folder. An example of the folder structure:
- app.py
- assets/
    |-- image.png
In your app.py file you can use the relative path to that image:
from dash import Dash, html

app = Dash()

app.layout = html.Div([
    html.Img(src='/assets/image.png')
])

if __name__ == '__main__':
    app.run(debug=True)
If placing images inside the
assetsfolder isn’t an option, then you can
also embed images “inline” with base64 encoding:
import base64
from dash import Dash, html

app = Dash()

image_filename = 'my-image.png'

def b64_image(image_filename):
    with open(image_filename, 'rb') as f:
        image = f.read()
    return 'data:image/png;base64,' + base64.b64encode(image).decode('utf-8')

app.layout = html.Img(src=b64_image(image_filename))
Changing the Favicon
It is possible to override the default favicon by adding
a file named favicon.ico to your assets folder. Changes to
this file will implement cache-busting automatically.
- app.py
- assets/
    |-- favicon.ico
Adding External CSS/JavaScript
You can add resources hosted externally to your Dash app with the
external_stylesheets & external_scripts init keywords.
The resources can be either a string or a dict containing the tag attributes
(src, integrity, crossorigin, etc). You can mix both.
External css/js files are loaded before the assets.
Example:
from dash import Dash, html


# external JavaScript files
external_scripts = [
    'https://www.google-analytics.com/analytics.js',
    {'src': 'https://cdn.polyfill.io/v2/polyfill.min.js'},
    {
        'src': 'https://cdnjs.cloudflare.com/ajax/libs/lodash.js/4.17.10/lodash.core.js',
        'integrity': 'sha256-Qqd/EfdABZUcAxjOkMi8eGEivtdTkh3b65xCZL4qAQA=',
        'crossorigin': 'anonymous'
    }
]

# external CSS stylesheets
external_stylesheets = [
    'https://codepen.io/chriddyp/pen/bWLwgP.css',
    {
        'href': 'https://stackpath.bootstrapcdn.com/bootstrap/4.1.3/css/bootstrap.min.css',
        'rel': 'stylesheet',
        'integrity': 'sha384-MCw98/SFnGE8fJT3GXwEOngsV7Zt27NXFoaoApmYm81iuXoPkFOJwJ8ERdknLPMO',
        'crossorigin': 'anonymous'
    }
]


app = Dash(__name__,
                external_scripts=external_scripts,
                external_stylesheets=external_stylesheets)

app.layout = html.Div()

if __name__ == '__main__':
    app.run(debug=True)
Controlling the Plotly.js Version Used by dcc.Graph
The dcc.Graph component leverages the Plotly.js library to render visualizations.
In Dash 2.13 and later, the dcc.Graph component uses the version of the Plotly.js library in the Plotly.py version you have installed. Each version of Dash prior to 2.13 included its own version of Plotly.js.
If you want to use a different version of Plotly.js in Dash 2.13 or later, you can use a different version of Plotly.py. See the Plotly.py releases page for more details on which version of Plotly.js was included with each release.
In all versions of Dash you can also override the Plotly.js version by placing a Plotly.js bundle in the assets directory.
You can override the Plotly.js version by placing a Plotly.js bundle in the assets directory.
This technique can be used to:
* take advantage of new features in a version of Plotly.js that is more recent than the one that is included in the currently installed version of Dash, Plotly.py, or Dash Design Kit.
* take advantage of more desirable behavior of a version of Plotly.js that is less recent than the one that is included in the currently installed version of Dash, Plotly.py, or Dash Design Kit. We strive to make Plotly.js releases completely backwards-compatible, so you shouldn’t have to do this very often.
* use a Plotly-distributed Plotly.js partial bundle or a custom-built Plotly.js bundle which only includes the subset of Plotly.js features that your Dash app uses. Partial bundles are smaller than the full Plotly.js bundles that come with the dcc.Graph component and Plotly.pyand can therefore improve your app’s loading time.
Rendering LaTeX Inside dcc.Graph Figures
To use the built-in Plotly.js capability of rendering LaTeX inside figure labels, the external_script functionality described above can be used: add external_scripts=["https://cdnjs.cloudflare.com/ajax/libs/mathjax/2.7.5/MathJax.js?config=TeX-MML-AM_CHTML" ] to the app = dash.Dash() call.
Customizing Dash’s Document or Browser Tab Title
The document title is the name of the web page that appears in your
web browser’s tab.
By default, it is Dash.
As of Dash 1.14.0, you can customize this title with the title= keyword:
app = Dash(__name__, title='Weekly Analytics')
Note - Prior to 1.14.0, setting
app.titlewas an unofficial way to
set this title. This is still possible but may be removed in the future.
We recommend usingtitle=instead.
Update the Document Title Dynamically Based on the URL or Tab
To set the document title dynamically, you can use a clientside callback
that updates the document.title as a side effect. The example below
sets the document.title based off of the currently selected tab.
from dash import Dash, html, dcc, Input, Output, clientside_callback

app = Dash()

app.layout = html.Div([
    html.Div(id='blank-output'),
    dcc.Tabs(id='tabs-example', value='tab-1', children=[
        dcc.Tab(label='Tab one', value='tab-1'),
        dcc.Tab(label='Tab two', value='tab-2'),
    ]),
])


clientside_callback(
    """
    function(tab_value) {
        if (tab_value === 'tab-1') {
            document.title = 'Tab 1'
        } else if (tab_value === 'tab-2') {
            document.title = 'Tab 2'
        }
    }
    """,
    Output('blank-output', 'children'),
    Input('tabs-example', 'value')
)

if __name__ == '__main__':
    app.run(debug=True)
Updating the page based off of the URL would be similar: the input of the
callback would be the pathname property of dcc.Location. See the
URLs and Multi Page Apps chapter for
a dcc.Location example.
Customizing or Removing Dash’s “Updating…” Message
When a callback is running, Dash updates the document title
(the title that appears in your browser tab) with the “Updating…”
message.
Customize this message with the update_title= property:
app = Dash(__name__, update_title='Loading...')
Or, prevent this message from appearing at all by setting update_title=None:
app = Dash(__name__, update_title=None)
Customizing Dash’s HTML Index Template
Dash’s UI is generated dynamically with Dash’s React.js front-end. So,
on page load, Dash serves a very small HTML template string that includes
the CSS and JavaScript that is necessary to render the page and some simple
HTML meta tags.
This simple HTML string is customizable. You might want to customize this
string if you wanted to:
- Customize the way that your CSS or JavaScript is included in the page.
For example, if you wanted to include remote scripts or if you wanted to
include the CSS before the Dash component CSS
- Include custom meta tags in your app. Note that meta tags can also be
added with the meta_tags argument (example below).
- Include a custom version of dash-renderer, by instantiating the
DashRenderer JavaScript class yourself. You can add request hooks this way, by providing
a hooks config object as in the example below.
Usage
Option 1 - index_string
Add an index_string to modify the default HTML Index Template:
from dash import Dash, html
external_stylesheets = ['https://codepen.io/chriddyp/pen/bWLwgP.css']
app = Dash(__name__, external_stylesheets=external_stylesheets)
app.index_string = '''
<!DOCTYPE html>
<html>
<head>
{%metas%}
<title>{%title%}<title>
{%favicon%}
{%css%}
<head>
<body>
<div>My Custom header<div>
{%app_entry%}
<footer>
{%config%}
{%scripts%}
{%renderer%}
<footer>
<div>My Custom footer<div>
<body>
<html>
'''
app.layout = html.Div('Simple Dash App')
if __name__ == '__main__':
app.run(debug=True)
The {%key%}s are template variables that Dash will fill in automatically
with default properties. The available keys are:
{%metas%} (optional)
The registered meta tags included by the meta_tags argument in dash.Dash
{%favicon%} (optional)
A favicon link tag if found in the assets folder.
{%css%} (optional)
<link> tags to css resources. These resources include the Dash component
library CSS resources as well as any CSS resources found in the assets folder.
{%title%} (optional)
The contents of the page <title> tag.
Learn more about <title>
{%config%} (required)
An auto-generated tag that includes configuration settings passed from
Dash’s backend to Dash’s front-end (dash-renderer).
{%app_entry%} (required)
The container in which the Dash layout is rendered.
{%scripts%} (required)
The set of JavaScript scripts required to render the Dash app.
This includes the Dash component JavaScript files as well as any
JavaScript files found in the assets folder.
{%renderer%} (required)
The JavaScript script that instantiates dash-renderer by calling
new DashRenderer()
Option 2 - interpolate_index
If your HTML content isn’t static or if you would like to introspect or modify
the templated variables, then you can override the Dash.interpolate_index
method.
from dash import Dash, html
class CustomDash(Dash):
def interpolate_index(self, **kwargs):
# Inspect the arguments by printing them
print(kwargs)
return '''
<!DOCTYPE html>
<html>
<head>
<title>My App<title>
<head>
<body>
<div>My custom header<div>
{app_entry}
{config}
{scripts}
{renderer}
<div>My custom footer<div>
<body>
<html>
'''.format(
app_entry=kwargs['app_entry'],
config=kwargs['config'],
scripts=kwargs['scripts'],
renderer=kwargs['renderer'])
app = CustomDash()
app.layout = html.Div('Simple Dash App')
if __name__ == '__main__':
app.run(debug=True)
Unlike the index_string method, where we worked with template string
variables, the keyword variables that are passed into interpolate_index
are already evaluated.
In the example above, when we print the input arguments of
interpolate_index we should see an output like this:
{
    'title': 'Dash',
    'app_entry': '\\n<div>\\n    <div>\\n        Loading...\\n    <div>\\n<div>\\n',
    'favicon': '',
    'metas': '<meta>',
    'scripts': '<script><script>\\n<script><script>\\n<script><script>\\n<script><script>',
    'renderer': '<script>var renderer = new DashRenderer();<script>',
    'config': '<script>{"requests_pathname_prefix": "/", "url_base_pathname": "/"}<script>',
    'css': ''
}
The values of the scripts and css keys may be different depending on
which component libraries you have included or which files
might be in your assets folder.
Customizing dash-renderer with Request Hooks
To instantiate your own version of dash-renderer, you can override Dash’s HTML Index Template and provide your own script that will be used instead of the standard script. This script should
somewhere call var renderer = new DashRenderer();, which instantiates the DashRenderer class. You can add this script to your index HTML when you’re setting
app.index_string, or you can override app.renderer like so:
from dash import Dash, html

external_stylesheets = ['https://codepen.io/chriddyp/pen/bWLwgP.css']

app = Dash(__name__, external_stylesheets=external_stylesheets)

app.renderer = 'var renderer = new DashRenderer();'

app.layout = html.Div('Simple Dash App')

if __name__ == '__main__':
    app.run(debug=True)
When you provide your own DashRenderer, you can also pass in a hooks object that holds request_pre and request_post functions. These request hooks will be fired
before and after Dash makes a request to its backend. Here’s an example:
from dash import Dash, html

external_stylesheets = ['https://codepen.io/chriddyp/pen/bWLwgP.css']

app = Dash(__name__, external_stylesheets=external_stylesheets)

app.renderer = '''
var renderer = new DashRenderer({
    request_pre: (payload) => {
        // print out payload parameter
        console.log(payload);
    },
    request_post: (payload, response) => {
        // print out payload and response parameter
        console.log(payload);
        console.log(response);
    }
})
'''

app.layout = html.Div('Simple Dash App')

if __name__ == '__main__':
    app.run(debug=True)
Notice the request_pre function takes the payload of the request being sent as its argument, and the request_post function takes both the payload and the response of the server
as arguments. These can be altered in our function, allowing you to modify the response and request objects that Dash sends to the server. In the example above, the request_pre
function is fired before each server call, and in the case of this example, it will console.log() the request parameter. The request_post function will fire after each server
call, and in our example will also print out the response parameter.
Customizing Meta Tags
Not sure what meta tags are?
Check out this tutorial on meta tags and why you might want to use them.
Dash adds some meta tags to your app by default:
-
A tag to tell Internet Explorer to use the latest renderer available for that browser:
<meta> -
A tag to set the encoding to UTF-8:
<meta> -
And in Dash 2.5 and later, a tag to control page layouts on mobile browsers:
<meta>
Overriding Default Tags
To override or add custom meta tags to your app, you can always override Dash’s
HTML Index Template. Alternatively, Dash provides a shortcut—
you can specify meta tags directly in the Dash constructor:
-
To clear the
name="viewport" content="width=device-width, initial-scale=1"tag (introduced in Dash 2.5), set an empty tag:app = Dash(__name__, meta_tags=[{"viewport": ""}]) -
To override the
http-equiv="X-UA-Compatible"meta tag, set a new one:```
app = Dash(name, meta_tags=[{‘http-equiv’: ‘X-UA-Compatible’, ‘content’: ‘IE=9’}])```
-
To override the
charsetmeta tag, set a new one:app = Dash(__name__, meta_tags=[{'charset': 'iso-8859-1'}])
Adding Additional Tags
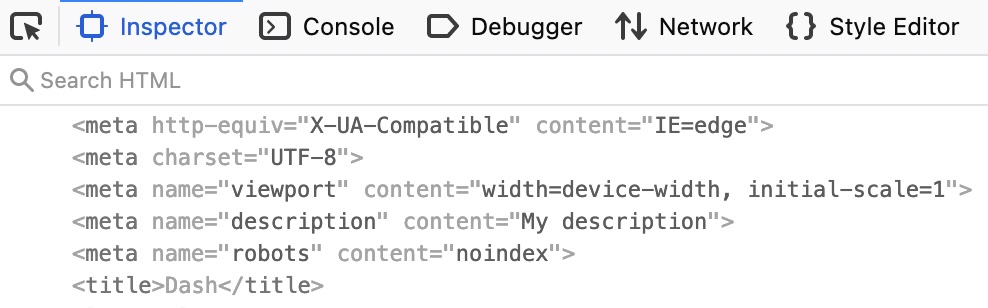
You can also add additional tags. Here’s an example of adding description
and robots meta tags.
from dash import Dash, html

app = Dash(meta_tags=[
    # A description of the app, used by e.g.
    # search engines when displaying search results.
    {
        'name': 'description',
        'content': 'My description'
    },
    # To request that crawlers not index a page
    {
        'name': 'robots',
        'content': 'noindex'
    }
])

app.layout = html.Div('Simple Dash App')

if __name__ == '__main__':
    app.run(debug=True)
If you inspect the source of your app, you’ll see the meta tags.
In this example, there are the two custom tags we added, along with
the three default meta tags.
Serving Dash’s Component Libraries Locally or from a CDN
Changed in Dash 1.0.0 - now serve_locally defaults to True,
previously it defaulted to False
Dash’s component libraries, like dash_core_components and dash_html_components,
are bundled with JavaScript and CSS files. Dash automatically checks with
component libraries are being used in your app and will automatically
serve these files in order to render the app.
By default, Dash serves the JavaScript and CSS resources from the
local files on the server where Dash is running. This is the more flexible
and robust option: in some cases, such as firewalled or airgapped
environments, it is the only option. It also avoids some hard-to-debug
problems like packages that have not been published to NPM or CDN downtime,
and the unlikely but possible scenario of the CDN being hacked. And of
course, component developers will want the local version while changing the
code, so when dev bundles are requested (such as with debug=True) we
always serve locally.
However, for performance-critical apps served beyond an intranet, online
CDNs can often deliver these files much faster than loading the resources
from the file system, and will reduce the load on the Dash server.
from dash import Dash

app = Dash(__name__, serve_locally=False)
This will load the bundles from the https://unpkg.com/ CDN, which is a community-maintained project that serves JavaScript bundles from NPM. We don’t maintain it, so we cannot guarantee or attest to its uptime, performance, security, or long term availability.
Also note that we don’t publish the dev bundles to unpkg, so when running the app locally with python app.py, the local JavaScript files will be served. When the app is deployed with gunicorn, it’ll switch to the CDN.
Sample Dash CSS Stylesheet
Currently, Dash does not include styles by default.
To get started with Dash styles, we recommend starting with this CSS stylesheet hosted
on Codepen.
To include this stylesheet in your app, copy and paste it into a file
in your assets folder. You can view the raw CSS source here:
https://codepen.io/chriddyp/pen/bWLwgP.css.
Here is an embedded version of this stylesheet.
<iframe><iframe>
Syntax Highlighting With Markdown
Both dash-table and
dash-core-components
support Markdown formatting, which you can use to specify
syntax highlighting for inline code.
Highlighting is handled by
highlight.js. By default, only
certain languages are recognized, and there is only one color
scheme available. However, you can override this by downloading a
custom highlight.js package. To do this, visit
https://highlightjs.org/download/,
and in the Custom package section, select all the
languages that you require, download your package, and place the
resulting highlight.min.js file into the assets folder.
The package should also come with a styles/ directory;
to use a different color scheme, copy the corresponding
stylesheet into your app’s assets folder.