Dash MCP on Plotly Cloud
Dash apps can act as MCP servers, letting AI agents like Claude and Cursor discover and interact with your app’s data and callbacks directly. See Dash MCP for how to build and configure an MCP server in your app.
This guide describes how Plotly Cloud can simplify and accelerate MCP development workflows.
Authentication and Access
When you deploy your app to Plotly Cloud, the platform handles authentication for you. Only users who already have access to the app can connect an agent to it. The app’s sharing settings govern that access, so you don’t need to manage API keys or any extra configuration.
This is the same access model the app already uses in the browser. A user who cannot view the app cannot connect an agent to it either.
Enabling MCP
There are two ways to enable the MCP server for an app on Plotly Cloud:
- In code: Pass
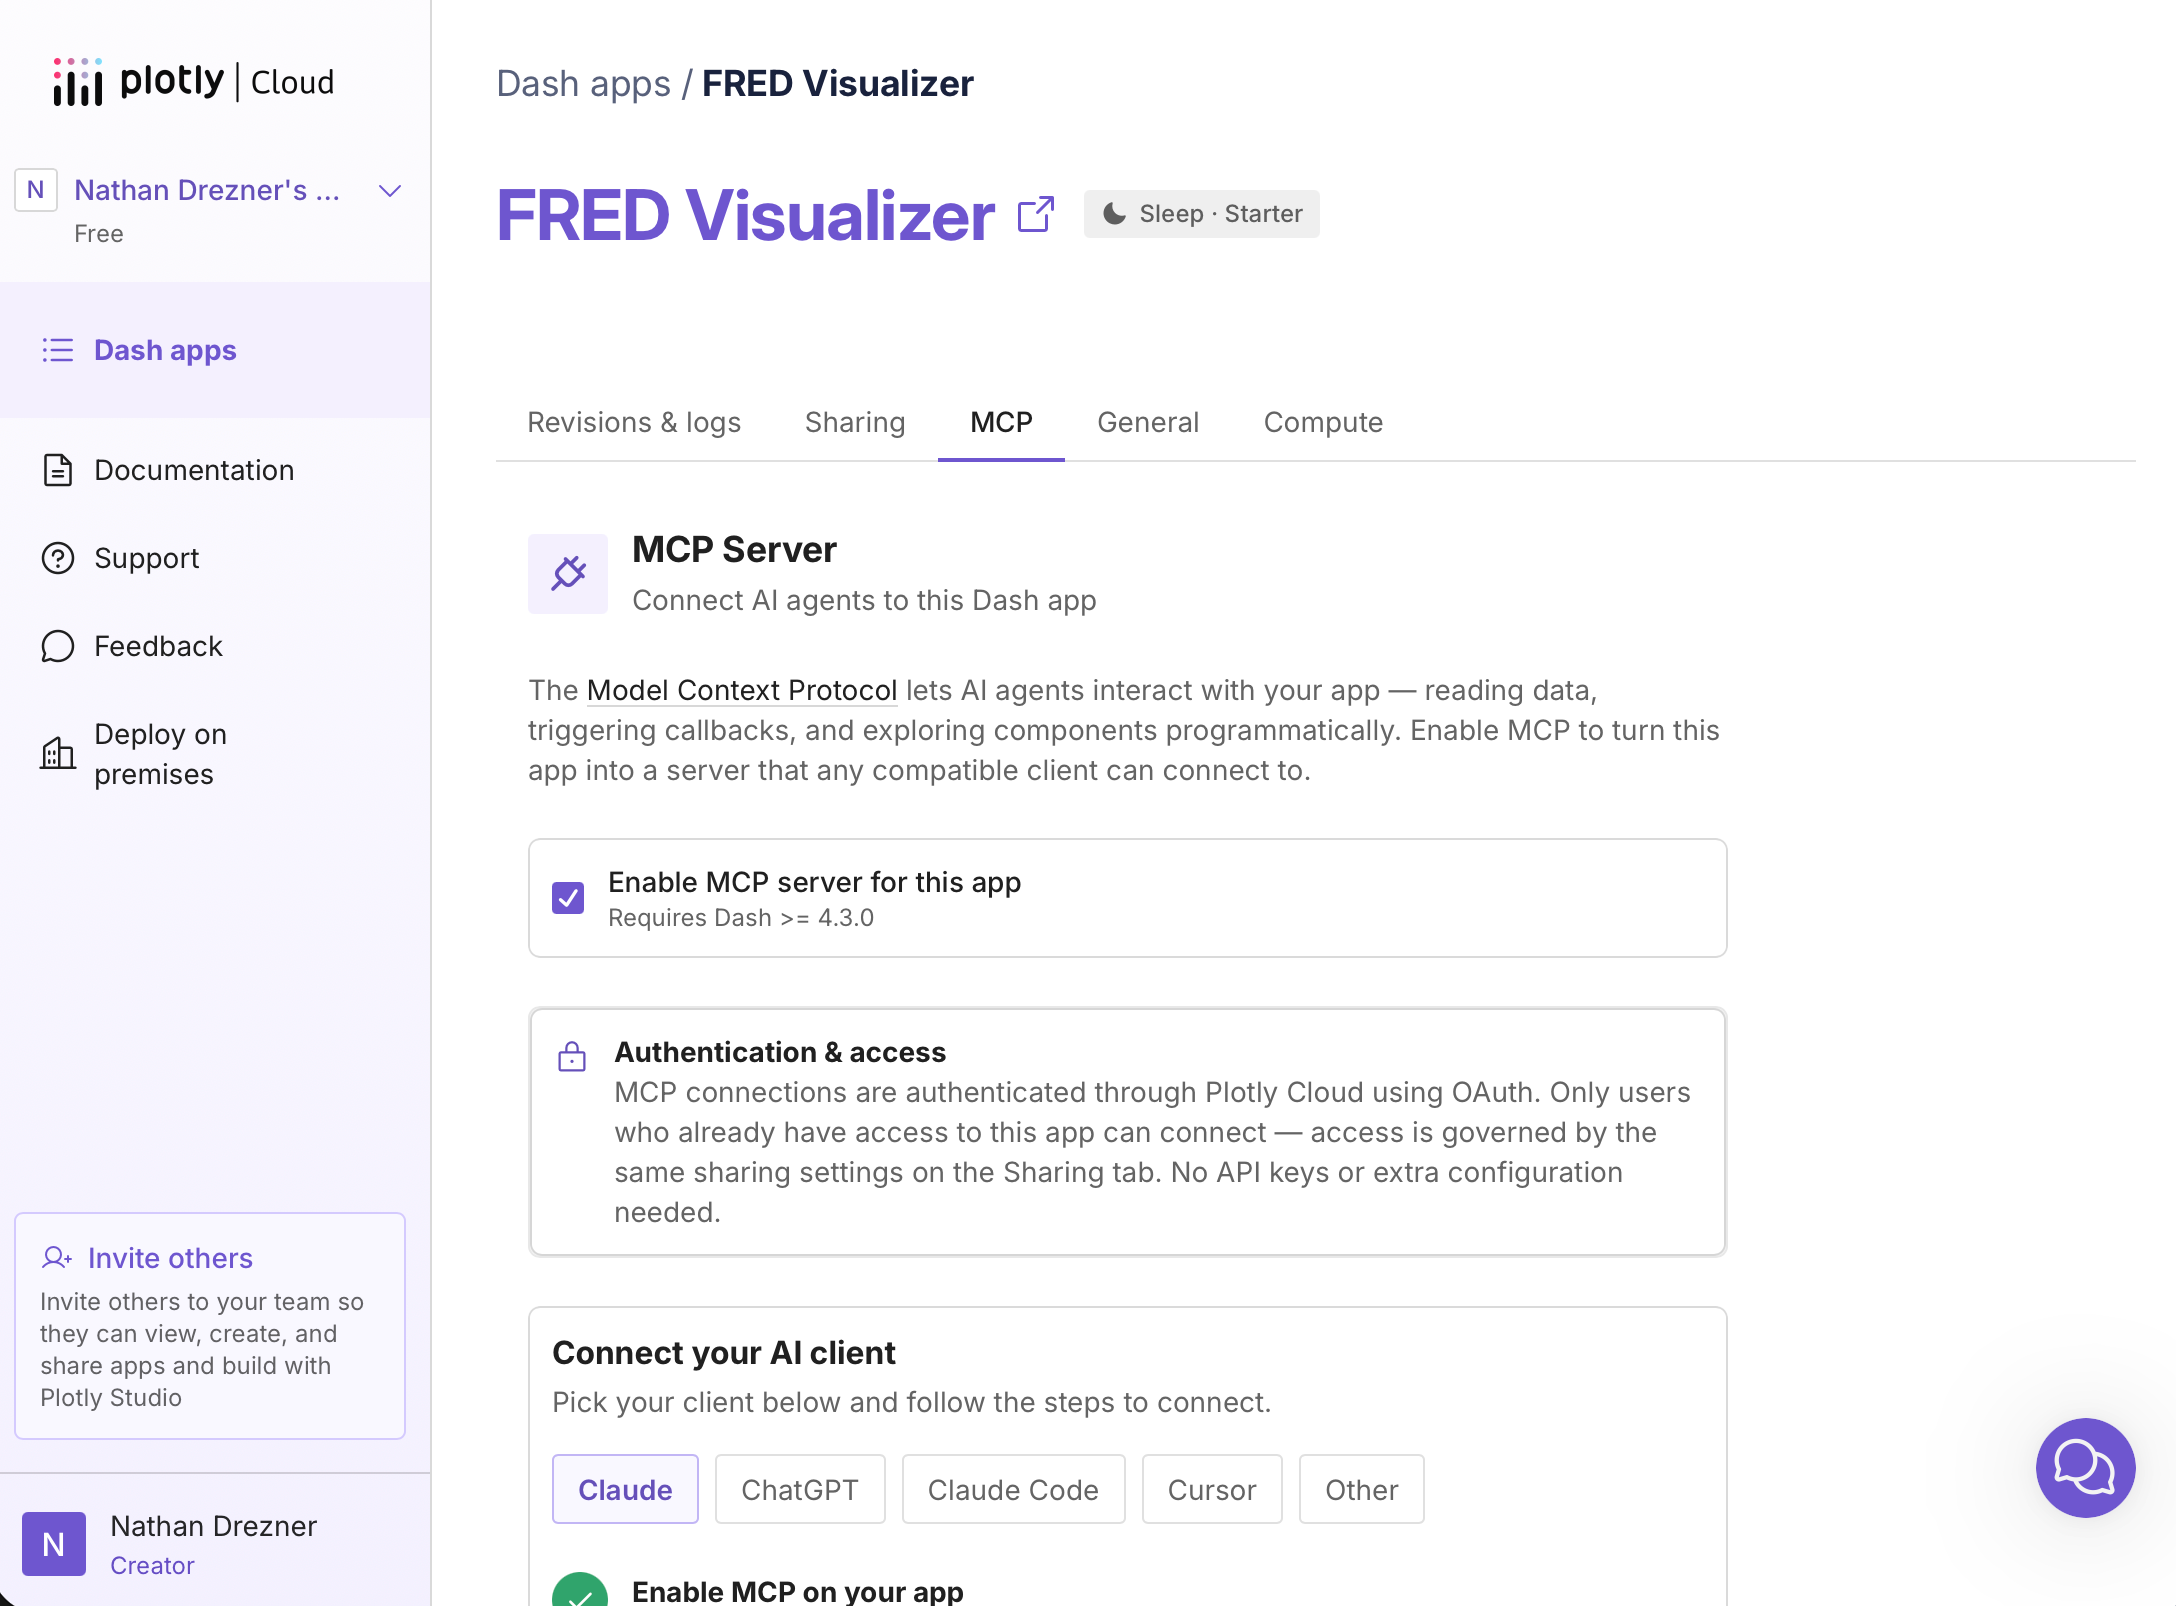
enable_mcp=Trueto theDashconstructor (or setDASH_MCP_ENABLED=True), as described in the Dash MCP overview. - From the Cloud UI: Open the app’s MCP tab and select Enable MCP server for this app. This setting applies to the whole deployed app and requires Dash 4.3.0 or later.
Note: A value passed to
enable_mcpin code always takes precedence over both theDASH_MCP_ENABLEDenvironment variable and the Plotly Cloud UI toggle. Enabling MCP in code turns the server on, but Plotly Cloud only shows the Connect an AI client instructions to people with access to the app when you enable MCP from the Cloud UI. Enable it in Plotly Cloud for any app that you want others to connect to.
If you use configure_mcp_server to control what the server exposes, Plotly Cloud applies that configuration the same way it does when you run the app locally.
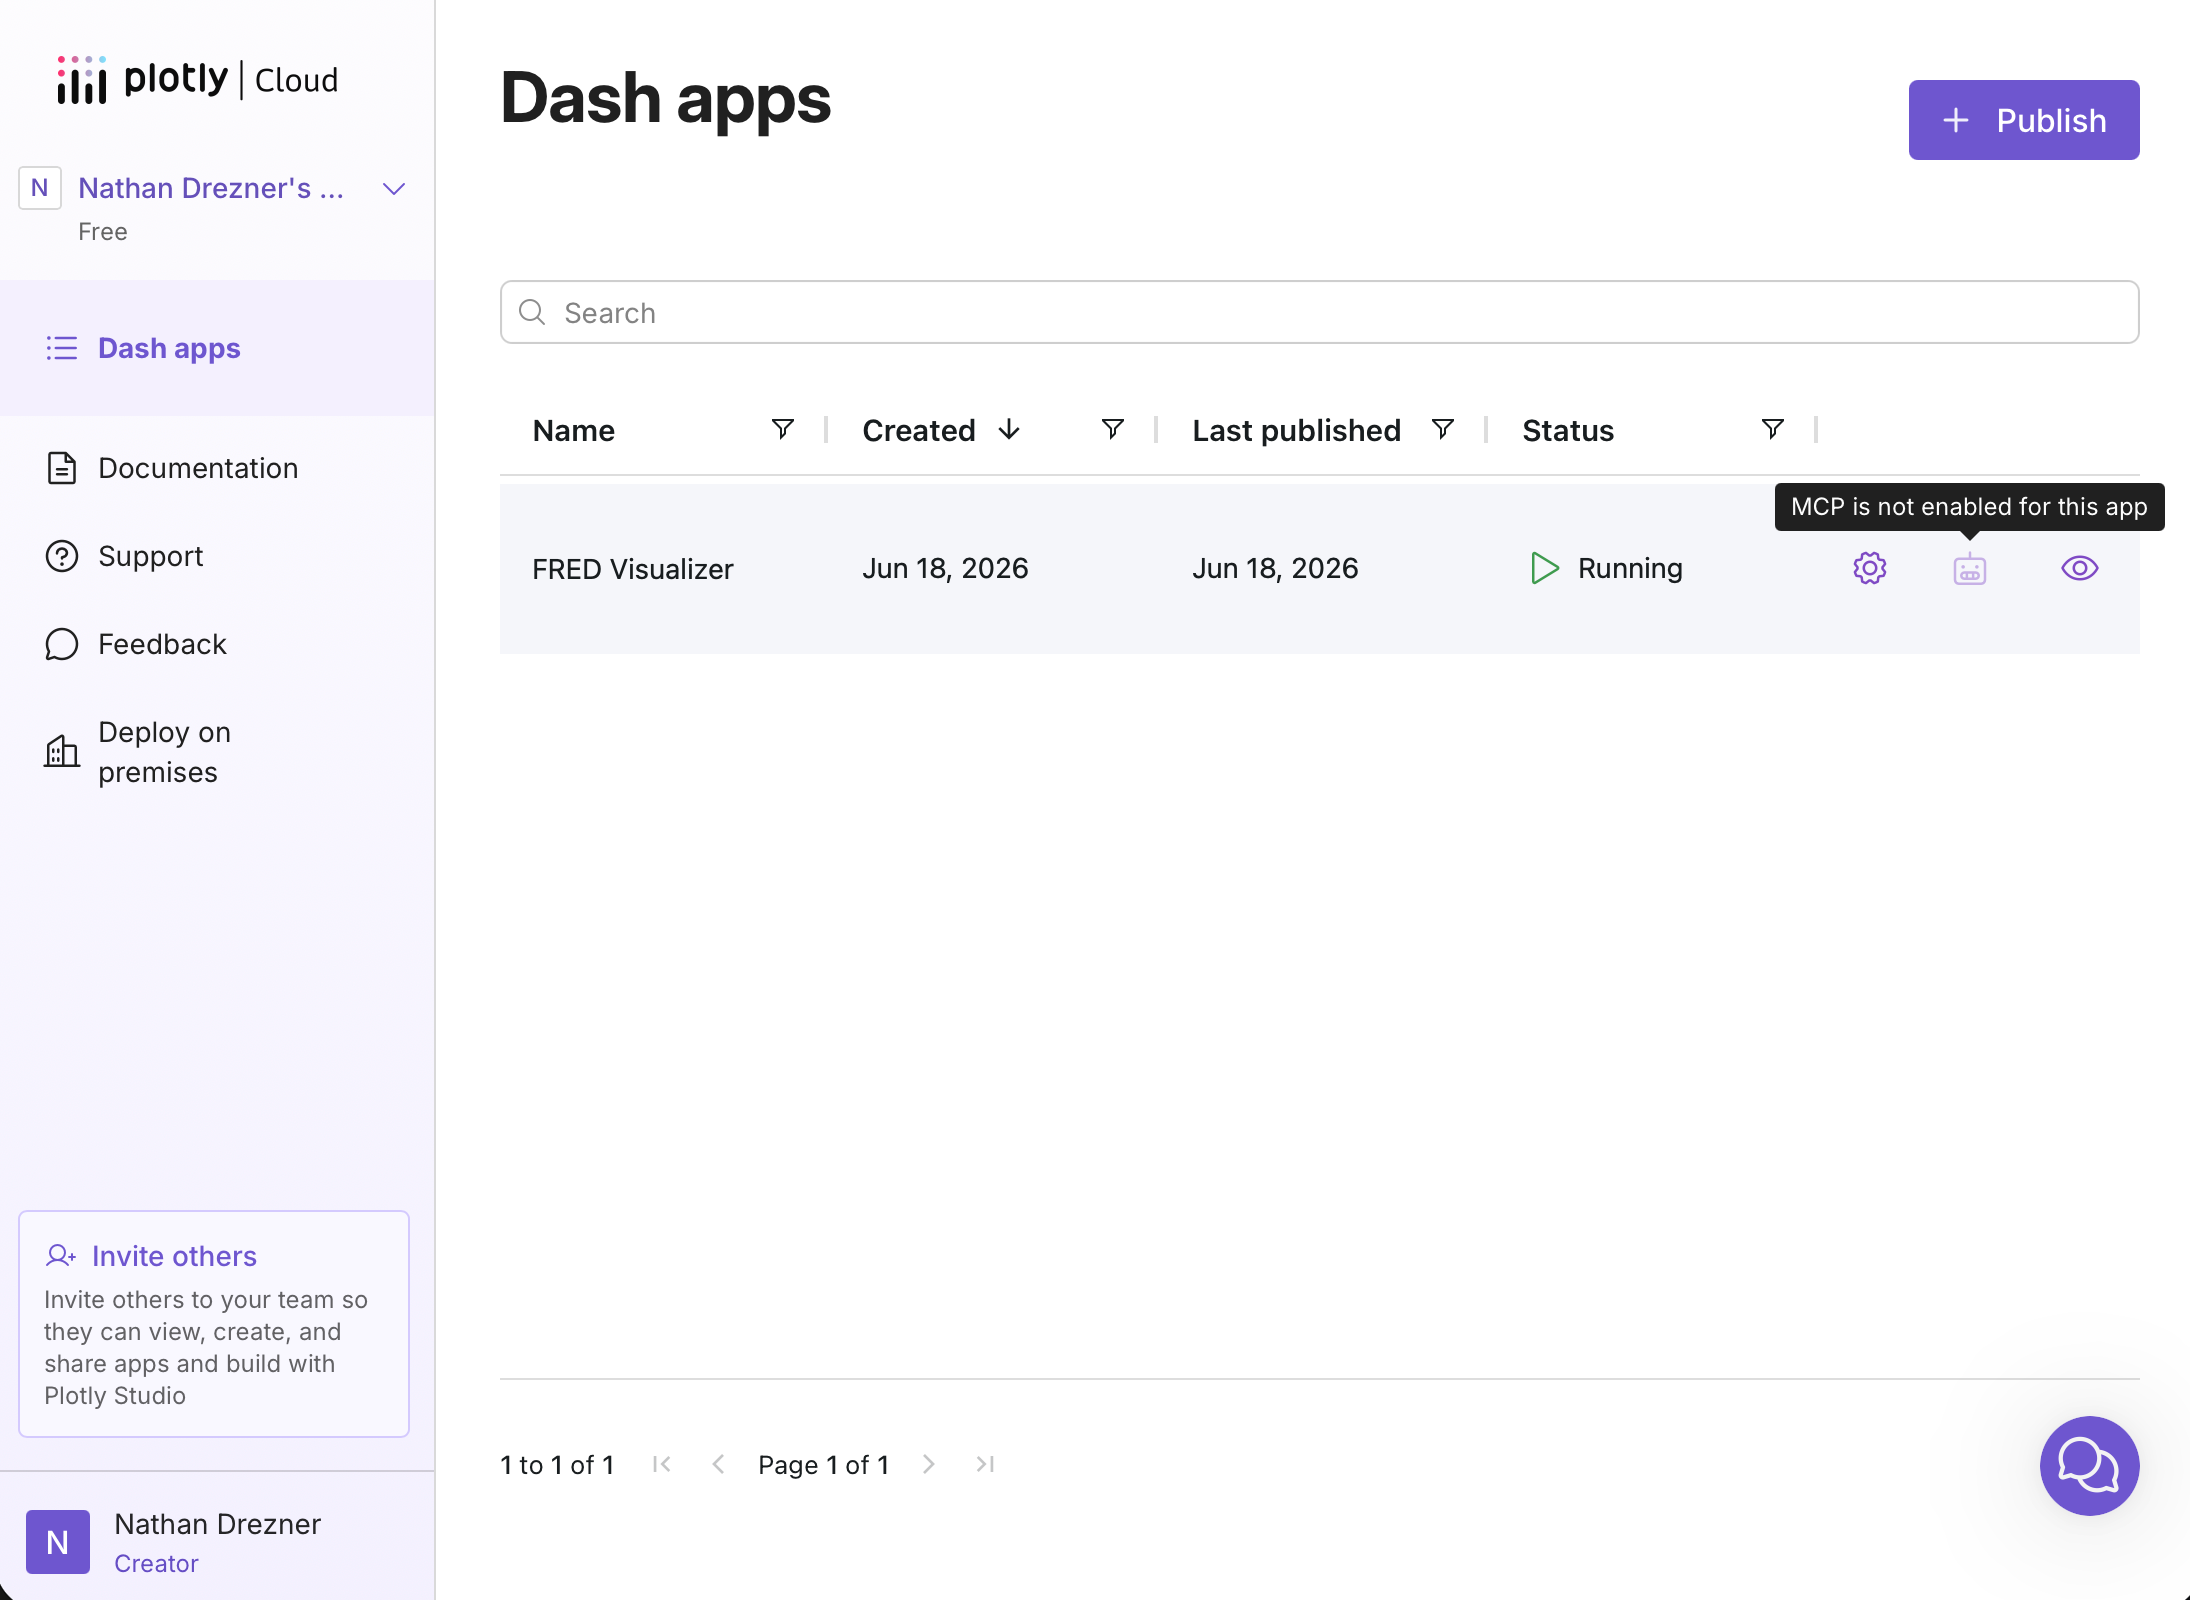
In the Dash apps list, an icon shows each app’s MCP status. When MCP is disabled, hovering the icon shows MCP is not enabled for this app.
Connecting an AI Client
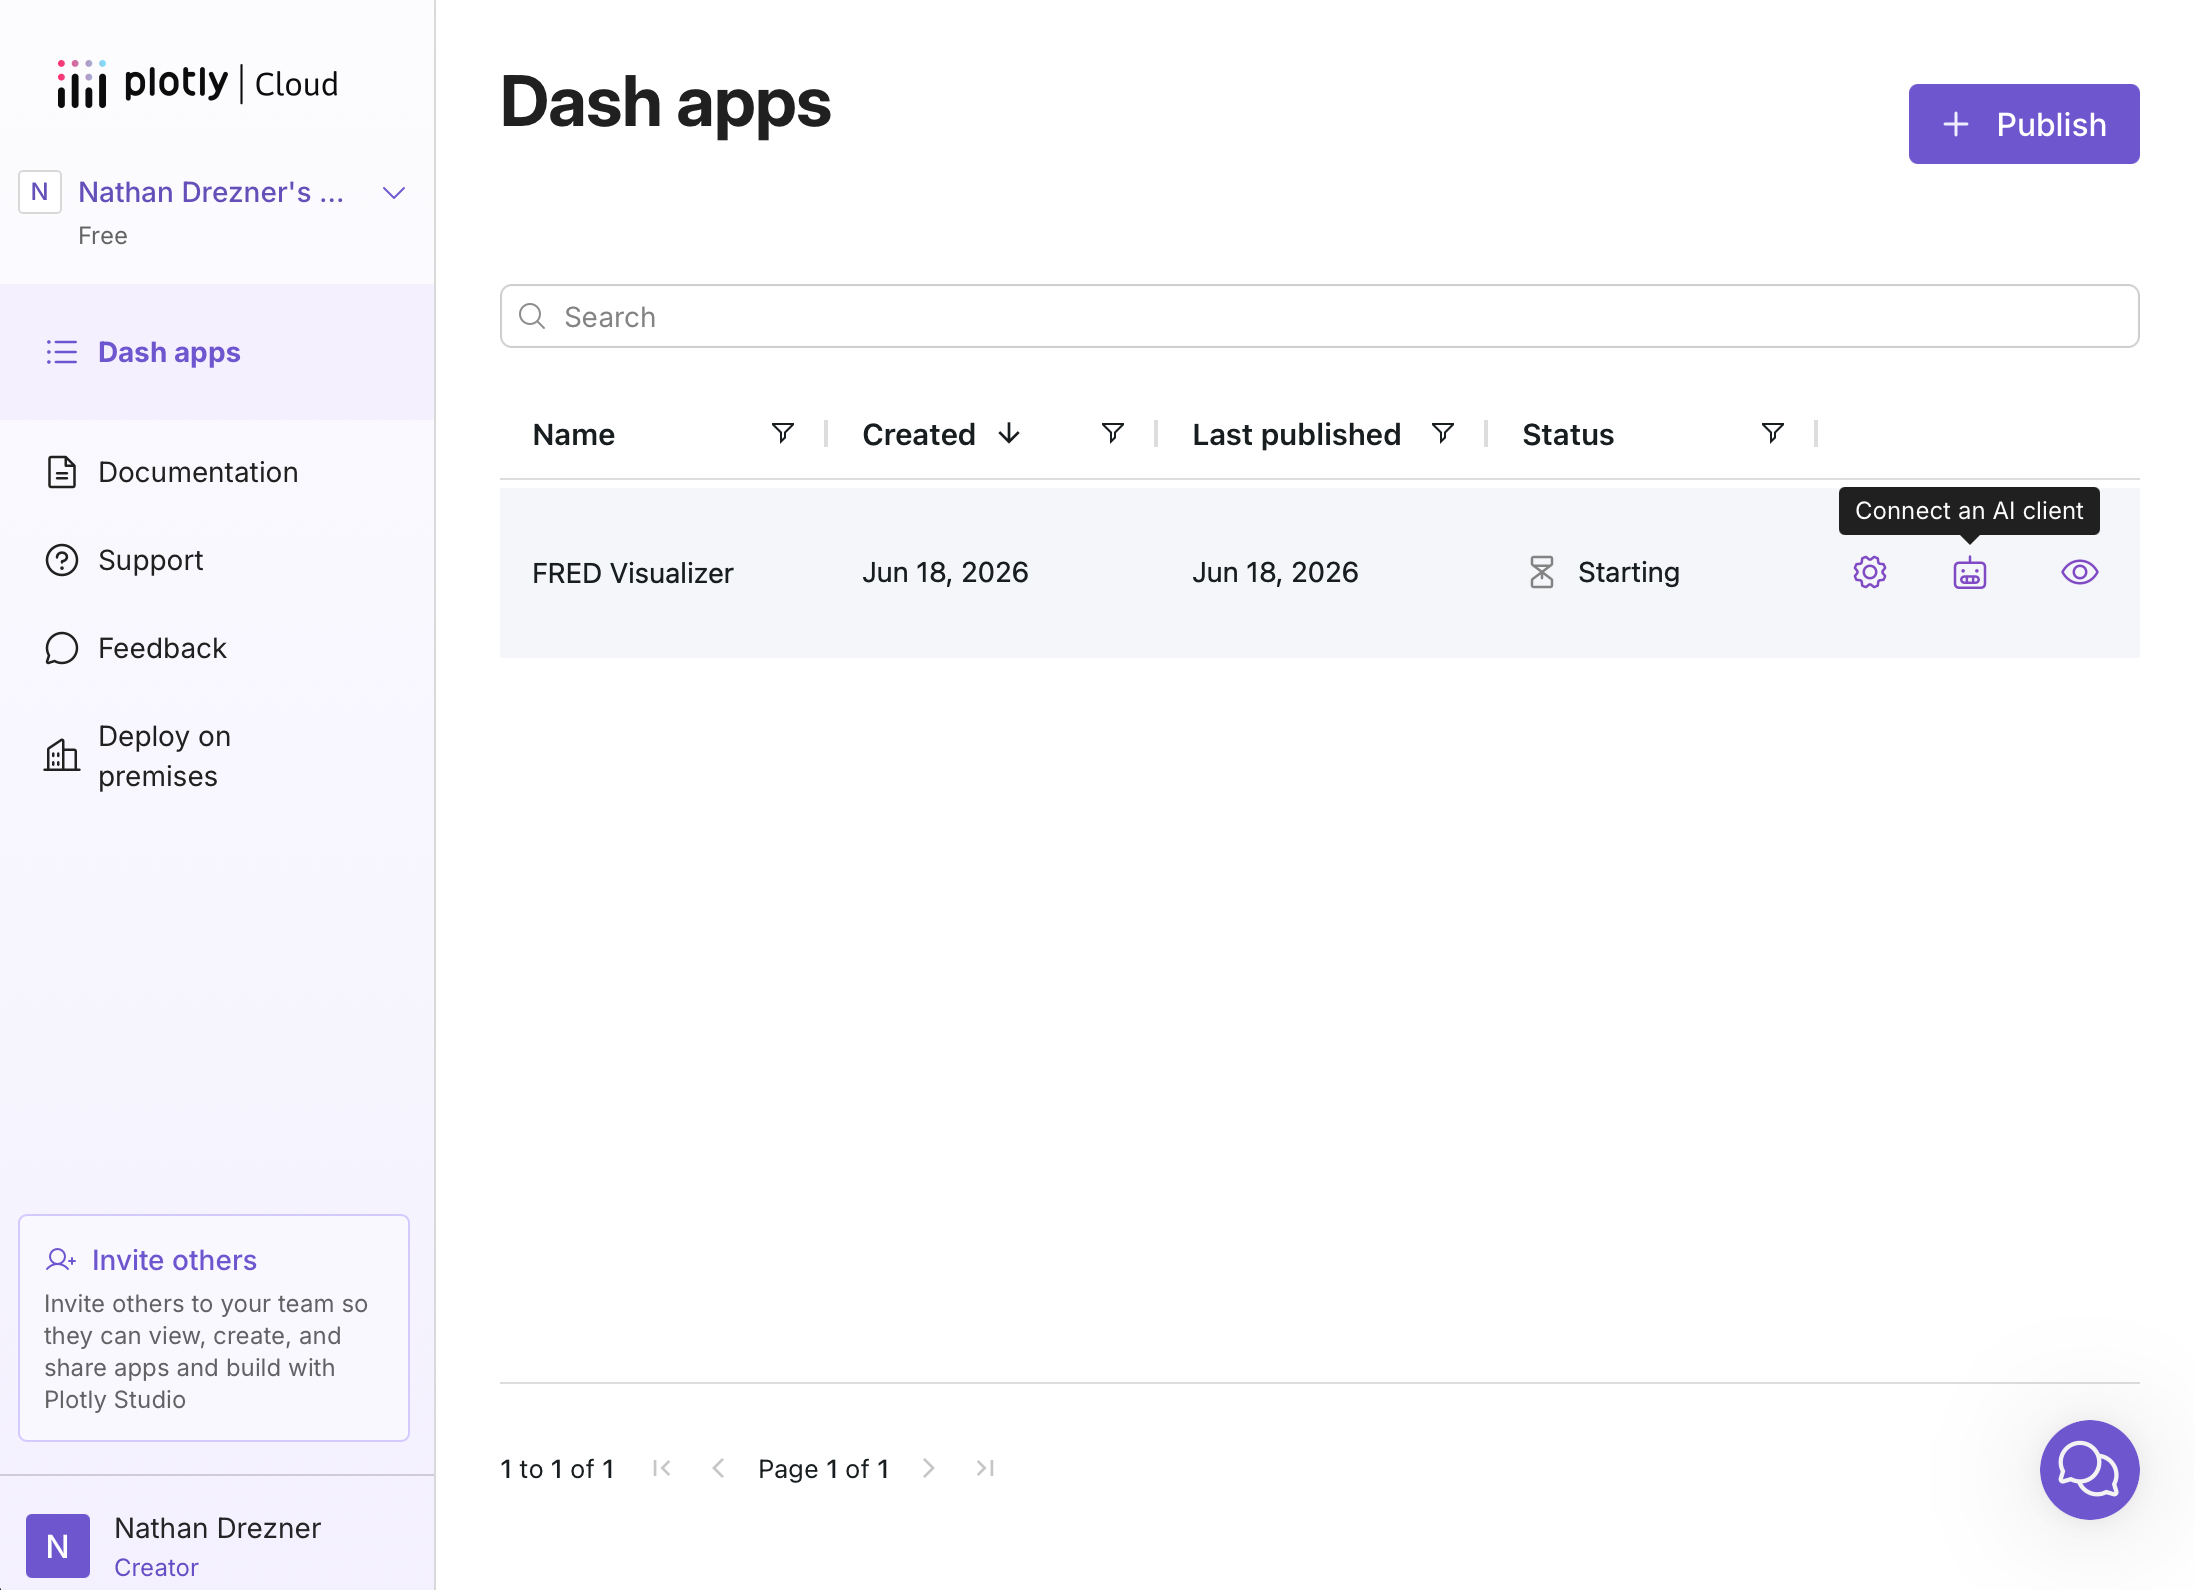
For an app with MCP enabled, the status icon in the apps list changes to Connect an AI client. Selecting it (or using the MCP tab) opens the MCP Setup dialog.
The dialog tailors its steps to the selected client (Claude, ChatGPT, Claude Code, Cursor, as well as others) and provides the server URL to connect with. For example, in Claude, you add a custom connector and paste the URL.
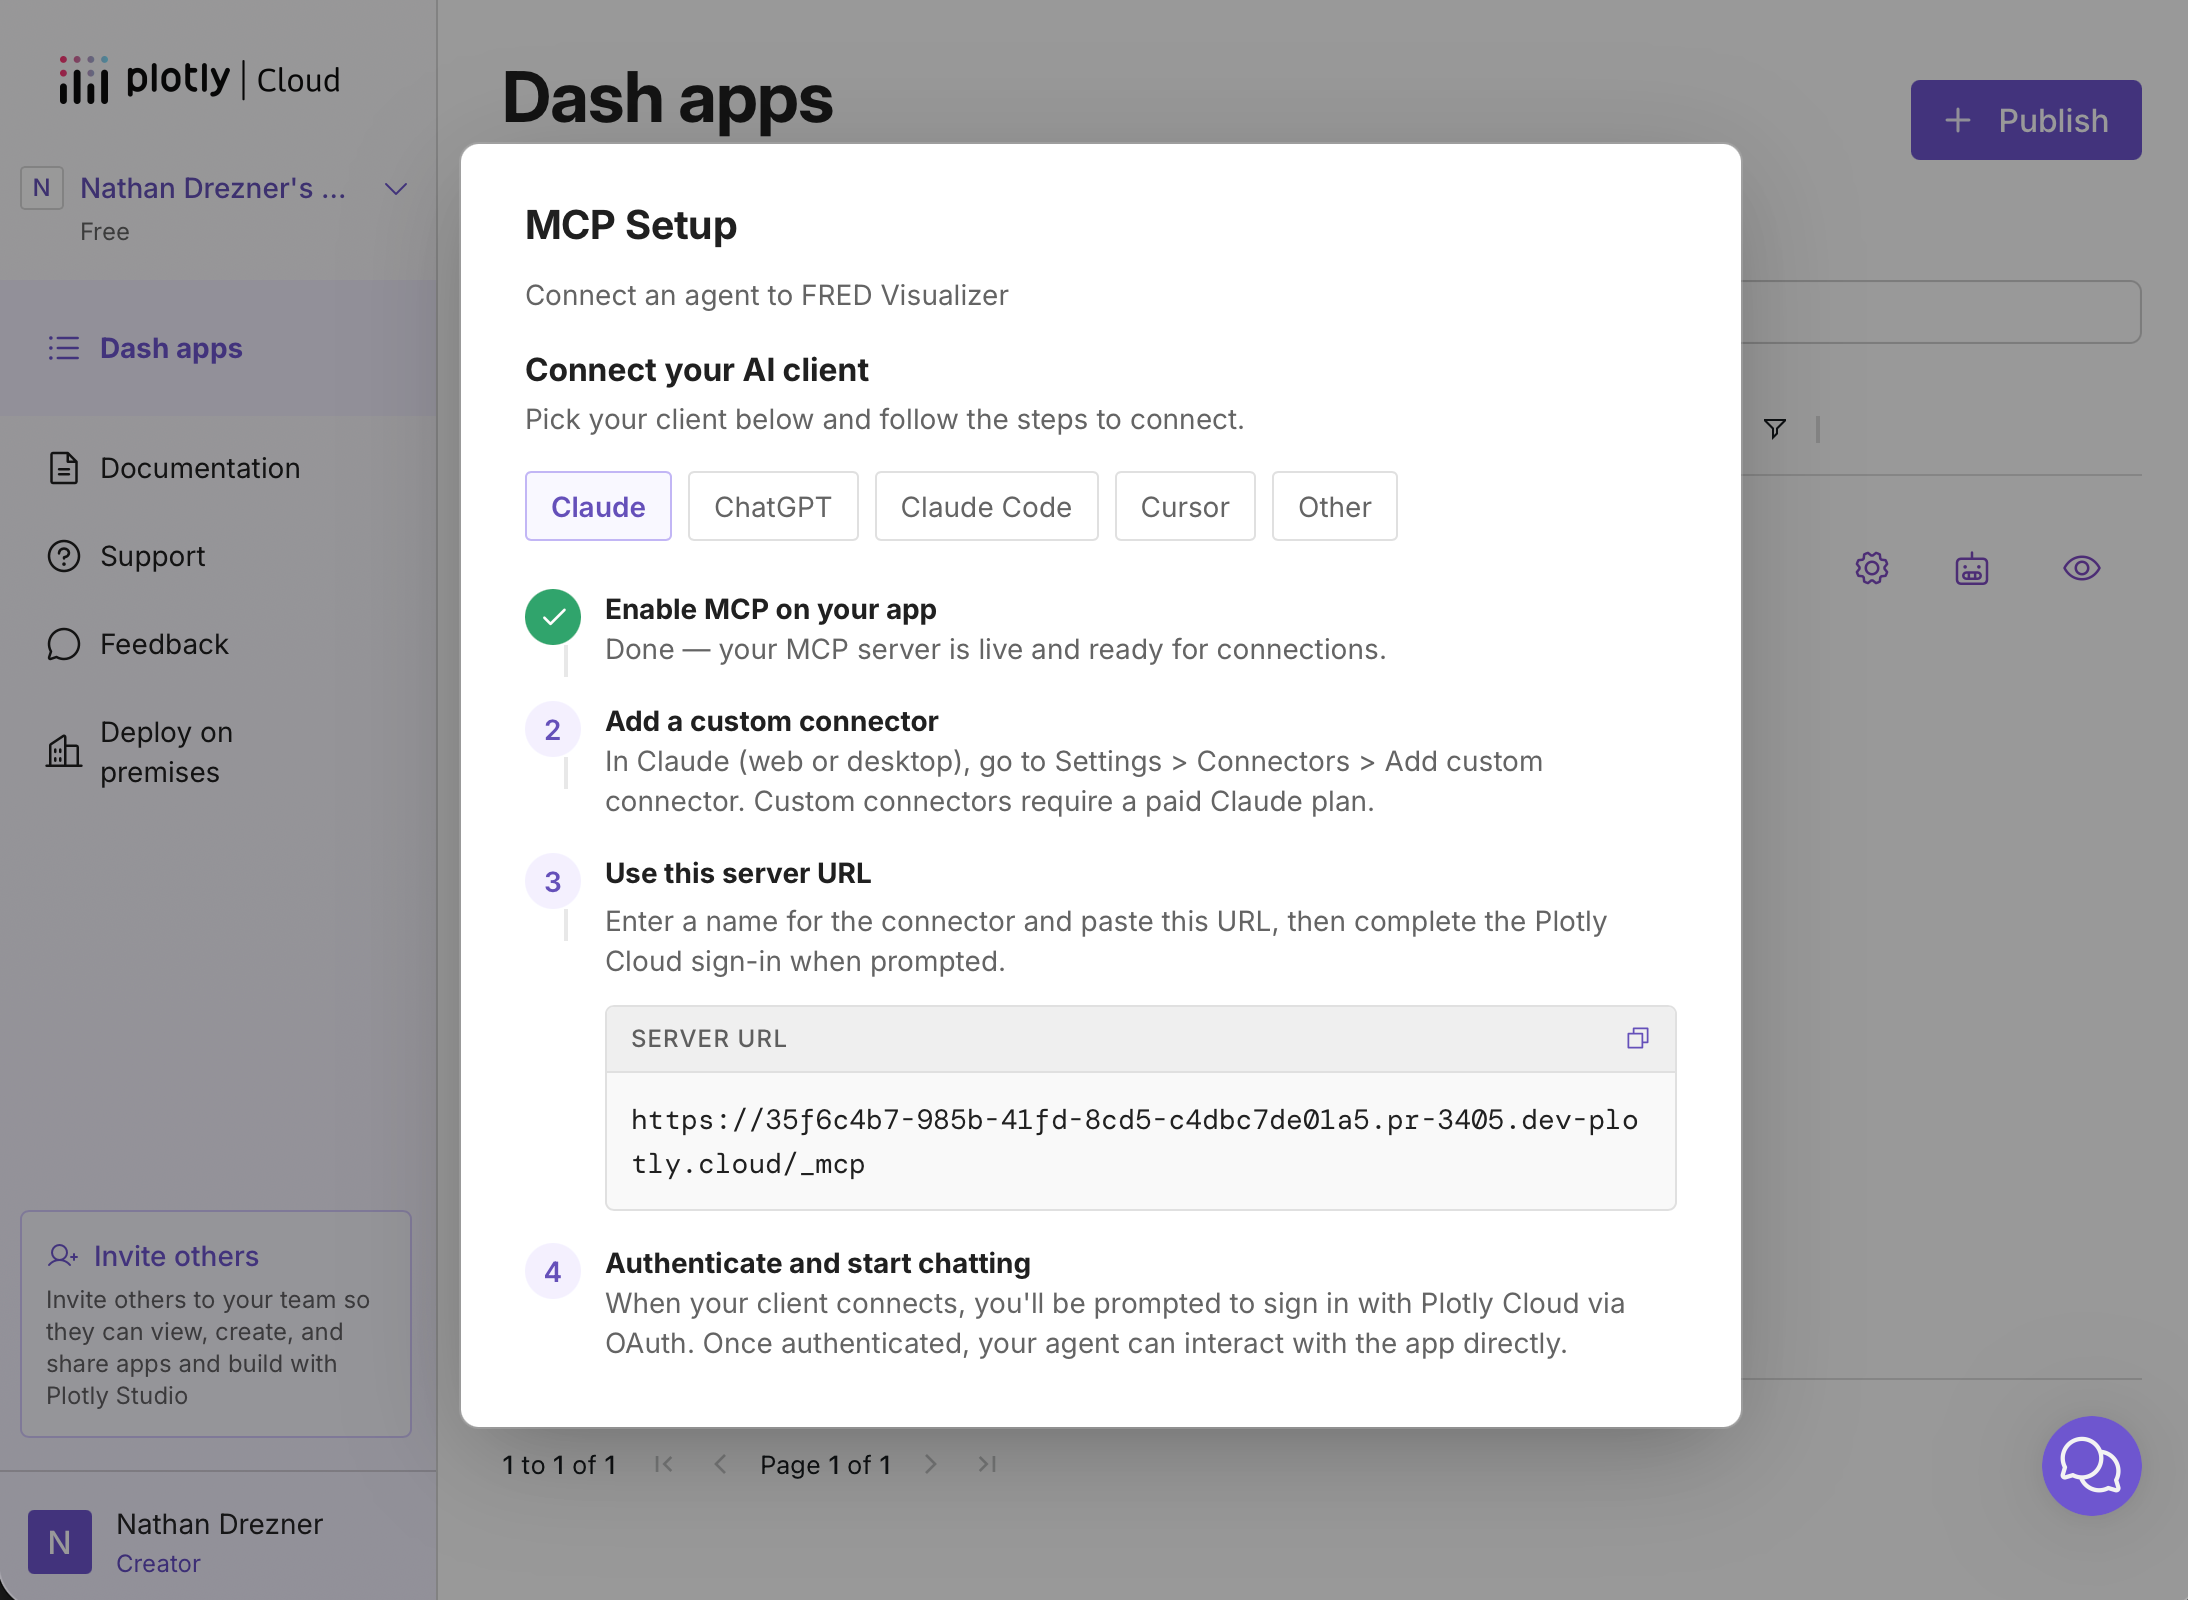
The final step is authentication. When the client connects, it prompts the user to sign in with Plotly Cloud. After signing in, the agent can interact with the app directly. This is the same flow described in Connecting an MCP Client, except Plotly Cloud handles the sign-in.
Note: If the app is asleep when it receives an MCP request, Plotly Cloud automatically wakes it and responds to the client once the app is awake.