 Click and Hover Callbacks
It’s possible to create callbacks based on user clicks and hovering. First, you need to specify the pickingModes prop in
dash_vtk.View to be a list of modes you want to capture. The following values are accepted:
* "click"
* "hover"
Afterwards, you need to create callbacks where the inputs and states include one of the following read-only properties of dash_vtk.View.
* clickInfo: Called when the user clicks on an object.
* hoverInfo: Called when the user hovers over an object.
The full documentation for
dash_vtk.Viewcan be found in the API reference.
Callback structure
You can notice that the clickInfo or hoverInfo data will be a dictionary with various keys describing the picked object. The keys include:
* displayPosition: The x,y,z coordinate with on the user’s screen.
* ray: A line between two points in 3D space (xyz1, xyz2) that represent the mouse position. It covers the full space under the 2D mouse position.
* representationId: The ID assigned to the dash_vtk.GeometryRepresentation containing your object.
* worldPosition: The x, y, z coordinates in the 3D environment that you are rendering where the ray hit the object. It corresponds to the 3D coordinate on the surface of the object under your mouse.
Output clickInfo to html.Pre
The following example shows you how to concisely display the output of clickInfo inside an html.Pre:
View full code
View full code
import json

from dash import Dash, html, Input, Output, callback
import dash_vtk

# Get it here: <a href="https://github.com/plotly/dash-vtk/blob/master/demos/data/cow-nonormals.obj">https://github.com/plotly/dash-vtk/blob/master/demos/data/cow-nonormals.obj</a>
with open("datasets/cow-nonormals.obj", 'r') as file:
    txt_content = file.read()

view = dash_vtk.View(
    id="click-info-view",
    pickingModes=["click"],
    children=[
        dash_vtk.GeometryRepresentation(id="cow-geometry", children=[
            dash_vtk.Reader(
                vtkClass="vtkOBJReader",
                parseAsText=txt_content,
            ),
        ]),
    ],
)

# Dash setup
app = Dash()
server = app.server

app.layout = html.Div([
    html.Div(view, style={"width": "100%", "height": "300px"}),
    html.B("Output of clickInfo (try clicking on the object above):"),
    html.Pre(
        id="click-info-output",
        style={'overflowX': 'scroll'}
    )
])


@callback(
    Output('click-info-output', 'children'),
    Input('click-info-view', 'clickInfo')
)
def display_clicked_content(click_info):
    return json.dumps(click_info, indent=2)


if __name__ == "__main__":
    app.run(debug=True)
Update representation state with hoverInfo
You can also construct more complex hover callbacks, which would affect the actor and state of your geometry representations.
In the terrain mesh demo, whenever you hover
over the surface, a callback is fired and the output is displayed on your screen:
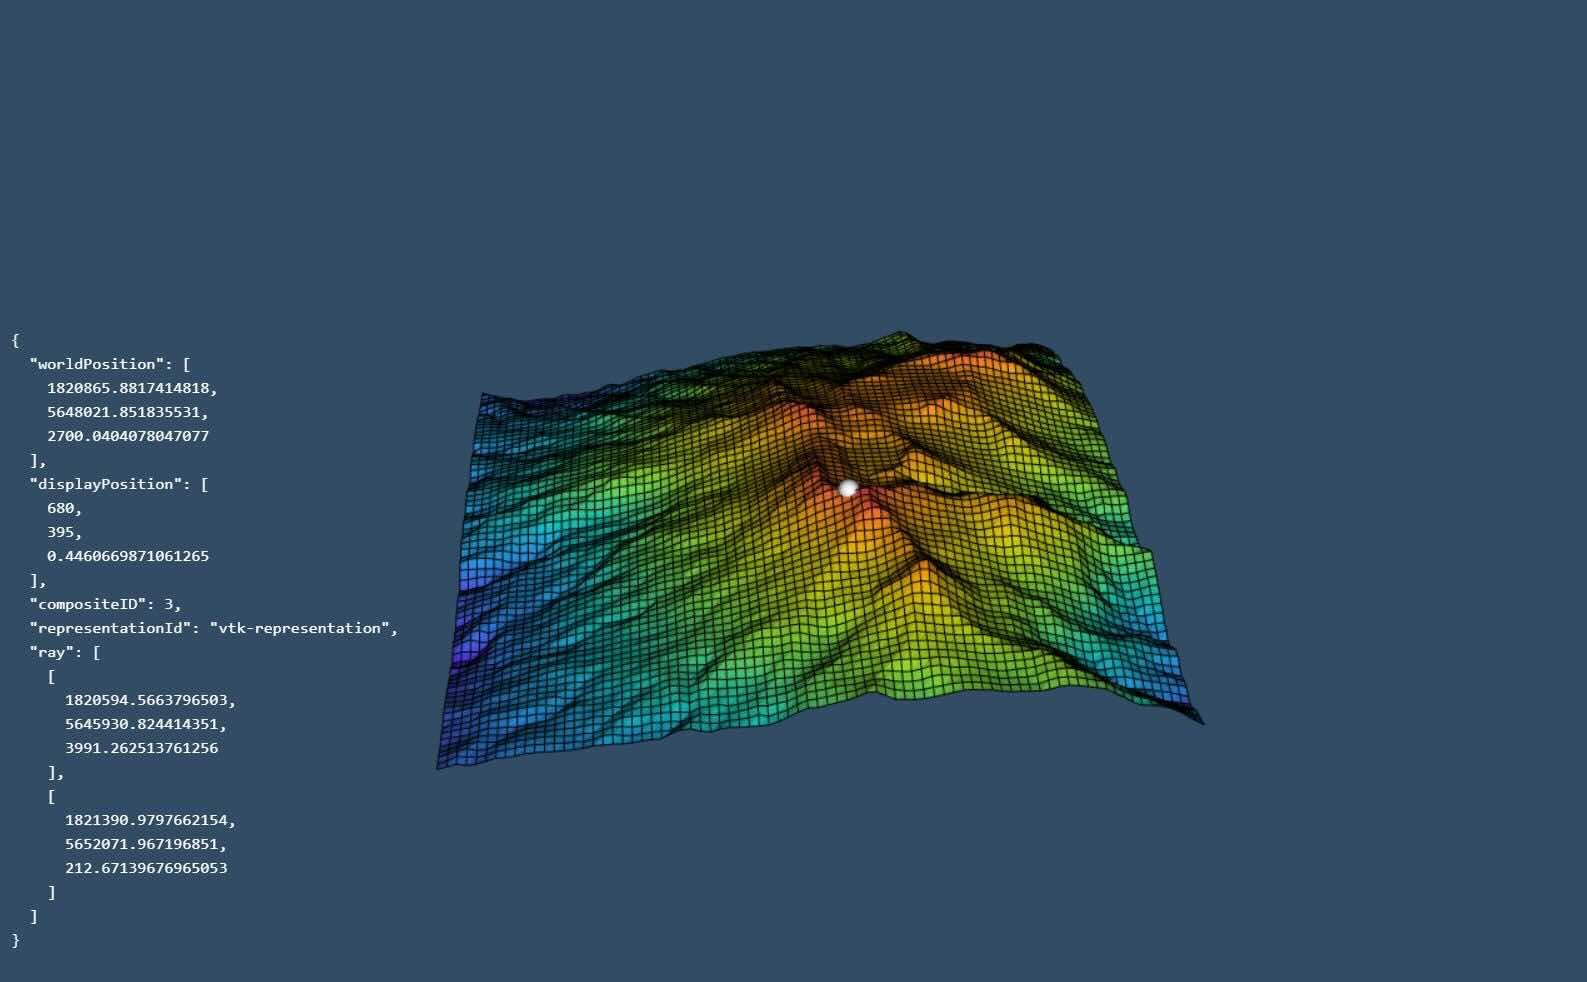
The full code can be found here, but the
following snippet summarizes what is needed to capture hover events in the image above:
# ...

vtk_view = dash_vtk.View(
    id="vtk-view",
    pickingModes=["hover"],
    children=[
        dash_vtk.GeometryRepresentation(id="vtk-representation", ...),
        dash_vtk.GeometryRepresentation(
            id="pick-rep",
            children=[
                dash_vtk.Algorithm(id="pick-sphere", ...)
            ],
            # ...
        ),
    ],
)

app.layout = html.Div([
  # ...,
  vtk_view,
  # ...
])

@callback(
    Output("tooltip", "children"),
    Output("pick-sphere", "state"),
    Output("pick-rep", "actor"),
    Input("vtk-view", "clickInfo"), Input("vtk-view", "hoverInfo"),
)
def onInfo(clickData, hoverData):
    info = hoverData if hoverData else clickData
    if info:
        if (
            "representationId" in info
            and info["representationId"] == "vtk-representation"
        ):
            return (
                [json.dumps(info, indent=2)],
                {"center": info["worldPosition"]},
                {"visibility": True},
            )
        return dash.no_update, dash.no_update, dash.no_update
    return [""], {}, {"visibility": False}
You can also use hoverInfo to update the state of another geometry representation. The image below shows how to update a cone position, orientation and size in order to probe the race car object:

Learn more by reading the Python source code or trying out the Vehicle Geometry app